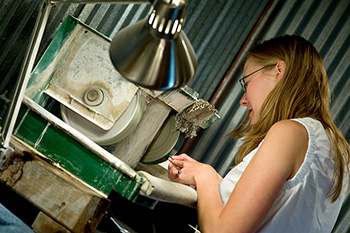
My name is Kish Mitchell. I moved to Durango, Colorado in the fall of 1997 to attend Fort Lewis College. While at school I worked as a lift operator for the ’98-’99 season at the local mountain, Purgatory, and met one of the inlayers that worked at Aldrich Art. With one conversation on the lift and an exchange of phone numbers I began working at Aldrich Art and learning how to inlay in April of 1999.
It was a long and sometimes frustrating process; it took me two years to really start to get proficient in this craft but mastering these techniques takes years. When people ask me how I can make these tiny pieces of art I say “very carefully,” which is true but not the best way of explaining it. In the following I will try to describe the process of how we inlay Aldrich Art jewelry in order to help the reader understand why our jewelry is unique.
For the inlaying process we use a wet stone saw with a diamond saw blade and a lapidary machine. We also need good lighting, an exacto blade, a mechanical pencil, and specialty glue.
To help illustrate the process of how Aldrich Art jewelry is created I made a cabochon to demonstrate how the process looks during its construction. In the pictures, I included a pencil to show you the approximate size of the stones.
We start by choosing the best rough stones by sawing and grinding them to a flat surface. After finding the correct color of stones that we need for a certain piece of jewelry, we then begin from the center and work outward.
Most of our inlay follows this type of process. The stone in the center is one piece of stone. We start by grinding down on two sides of the center stone to the particular size needed. The next color or bar is added by gluing two pieces of stone and grinding it down to the shape you are forming and then gluing the next two pieces onto the cabochon to complete the color (or bar). This same process is repeated until you have a rough cabochon. At this point the inlay process is finished but still requires more work to be done before it is a finished product. The silversmiths take over and grind the cabochon to the size needed and polish the stone to make it shine.
Our silversmiths have remarked to me on occasion that they marvel at how we can inlay such small stones, but I feel the same about the work they do. I believe Aldrich Art operates with a mutual respect and admiration for what each individual constructs, from designer to inlayer to silversmith.
We hope you enjoy and cherish your jewelry that you purchase from us.
-Kish


